Making tiny booklets with typst
In my student years I've spent plenty of time with LaTeX, a typesetting system from the 80s. It's been the gold standard for scientific writing, and we put up with its oddities and weird workarounds, because the alternative would be wasting countless hours doing manual formatting and layout in any WYSIWYG editor.
But a couple of years ago, a new kid arrived: Typst. I've always been wanting to give Typst a try, but never had a good reason to do it - until this week.
For a card game I recently wanted to make some small reference sheets, and Typst helped with that.
In this post I'll share my experience of using Typst to layout tiny 8-page booklets like the one you see below.

Why booklets?
This whole endeavor was inspired by a solo TTRPG booklet called Hero-ish by techDweeb. The whole game fits into this gorgeous booklet:
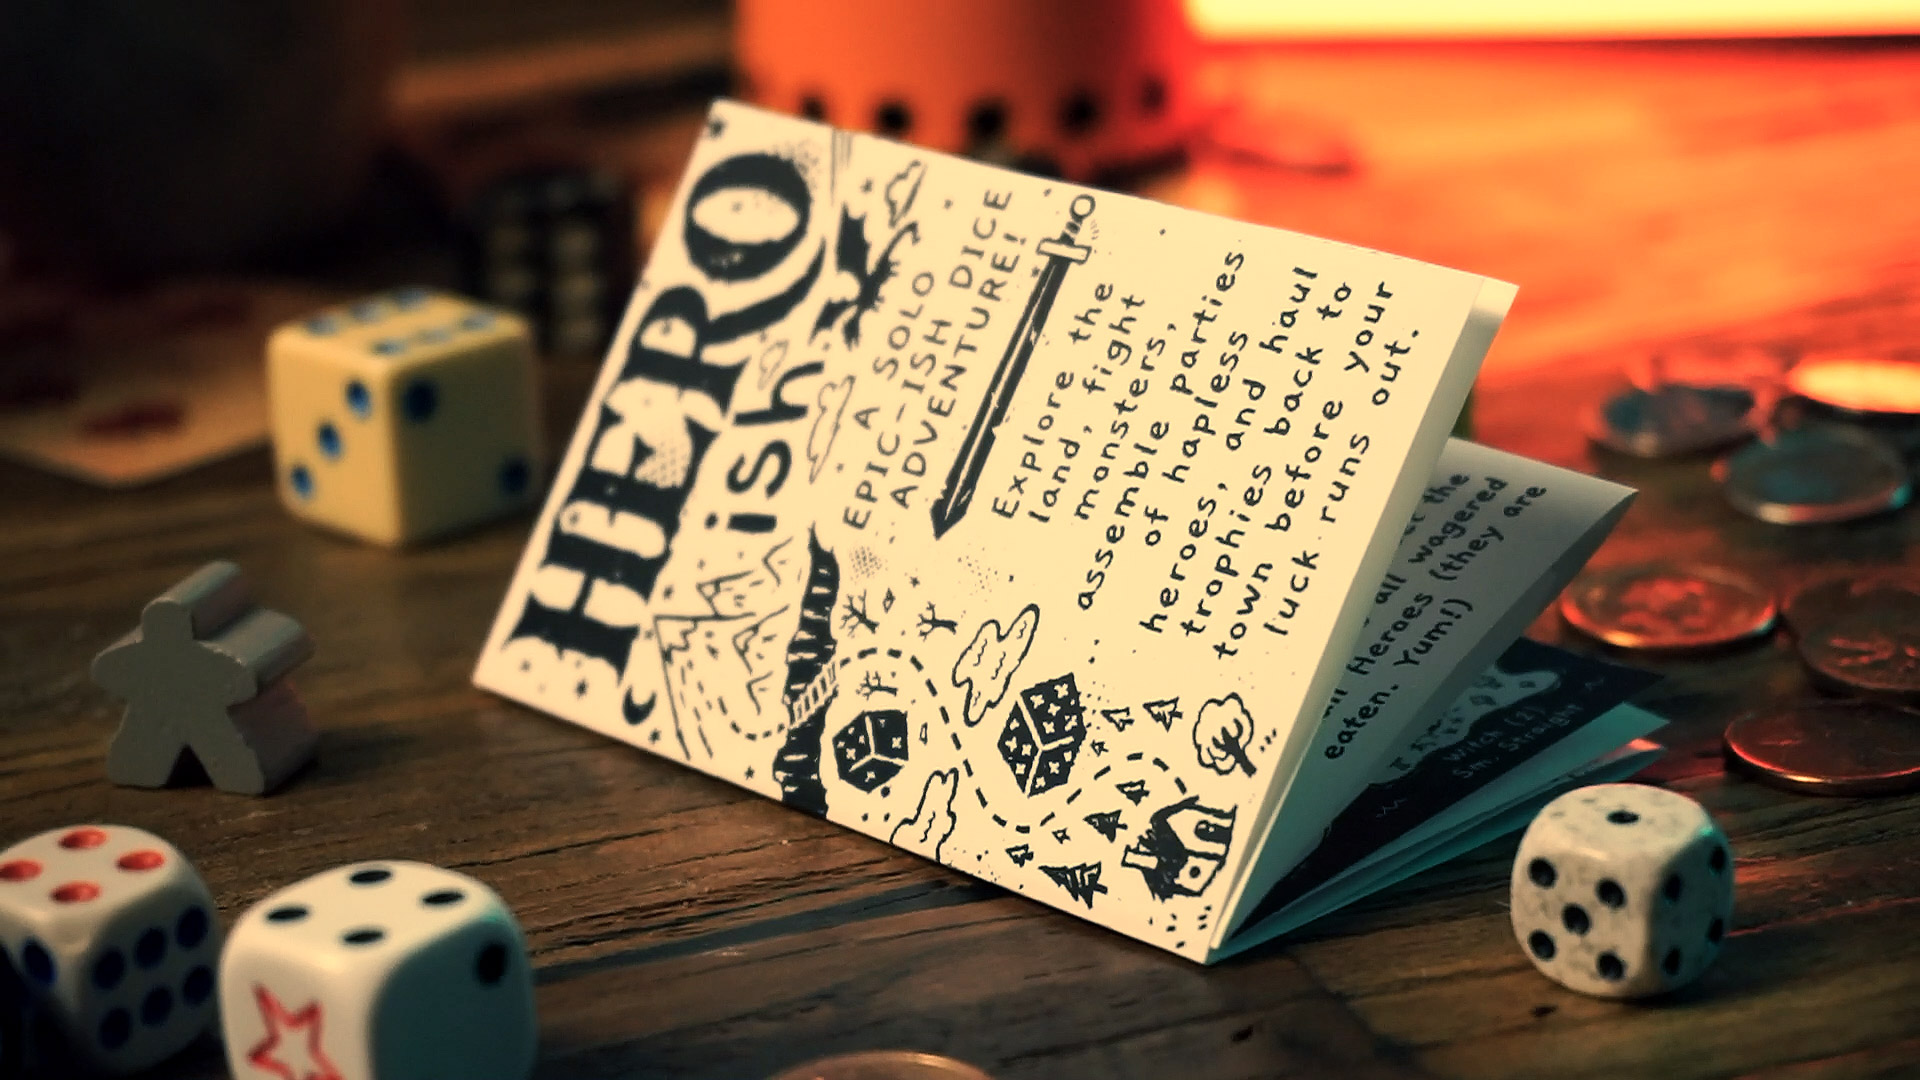
You can get a printable copy of Hero-ish and other games on techDweeb's itch.io.
I think we can agree that techDweeb's booklet looks way better than mine, but I can at least contribute what I learned about Typst in my project.
Typst
So where does Typst fit into all of this?
These booklets are surprisingly easy to make, once you figured out the layout. For a tiny 8-page booklet that prints on a single sheet, the diagram below shows how the eight mini-pages of content fit onto an A4 sheet. You just need to arrange your content as shown, print it, trim to the red outline, fold it, and cut along the red line.

This illustration shows how to fold and cut the booklet exactly.

While the layout is fairly simple, it does involve some rotated pages, and the page sequence also isn't very intuitive.
For a one-off project, you can easily achieve that with Inkscape. It gives you all the tools you need to lay out the content as above, and as long as you save it as svg, you can always come back later to arrange things.
But I wanted to see if Typst could make this easier for me, somehow.
I approached this by breaking up the process into two stages:
- Render the content of the booklet to a normal document.
- Arrange the pages of this document onto one A4 page for printing and cutting a booklet.
This felt more achievable than forcing the content into the final layout in a single step.
In the rest of this blog post I'll walk you through this approach. Some basic knowledge of Typst will help to read along. There are some starting resources here if you need them.
Step 1: Render the content
We'll start by rendering the content to a normal document, in a file
content.typ.
The final booklet has "pages" of 63 by 88 millimeters, but other than that,
there's nothing special going on in this stage: I'm setting the page size, I'm
adding a cover
page,
and then filling the document with the actual content.
For this blog post I've included page numbers and increased the font size to make it easier to see which page is placed where in the final layout.
// content.typ

// Each page is 63x88mm.
#let page-width = 63mm
#let page-height = 88mm

#set page(
  width: page-width,
  height: page-height,
  numbering: "1",
)

#set text(
  size: 14pt,
)

// Start with a cover image, imported from 'cover.svg'
#page(
  margin: 0pt,
  image(
    "cover.svg",
    fit: "contain",
  )
)

// Then fill with placeholder content
#lorem(800)
Now compile this with typst compile content.typ. You should see a file
content.pdf with (at least) 8 tiny pages, like below:

Step 2: Arrange the pages
With the pages in the desired size, I moved on to arranging them. For this, I
created a second file,
layout.typ,
in which I arrange the content pages onto a single A4 sheet.
We'll start off by specifying the size of our final layout, which is 4x2
mini-pages. We re-use the page size that we configured in content.typ.
// layout.typ

#import "content.typ": page-width, page-height

#set page(
  width:  4 * page-width,
  height: 2 * page-height,
  margin: 0mm,
)
Next, we'll define a function that places a page of our content document in this document. Here we use Typst's ability to include pages of PDFs as if they were images. This is how we take pages of our content document and place them into our layout on the right position, in the right orientation.
This wrapper also lets us rotate that page by a given angle.
#let document = "content.pdf"

#let minipage(angle, page) = box(
  // Uncomment to show page outline
  // stroke: 0.1pt + black,
  rotate(
    angle,
    image(
      document,
      page: page,
      width: 63mm,
      height: 88mm,
    )
  )
)
Finally, we need to remove some default spacings between paragraphs and words:
#set par(
  leading: 0mm,
  spacing: 0mm,
)

#set text(
  spacing: 0mm,
)
And then, surprisingly, it's just a matter of telling Typst where to place which page:
// Recall that this is the layout we're going for:
// 5 | 4 | 3 | 2  <- these are rotated by 180deg, individually
// 6 | 7 | 8 | 1

#box(
  // This adds a hairline around the page
  stroke: 0.1pt + black,
  {
    minipage(180deg, 5)
    minipage(180deg, 4)
    minipage(180deg, 3)
    minipage(180deg, 2)

    // Move the remaining pages to the next line
    linebreak()

    minipage(0deg, 6)
    minipage(0deg, 7)
    minipage(0deg, 8)
    minipage(0deg, 1)
  }
)
The #box here is optional, but adds a hairline around the final page, which
makes it easier to trim the booklet to size before folding.
The extra linebreak after the fourth minipage moves the remaining pages to the second line.
The final step is to compile that with typst compile layout.typ, and you
should be left with a perfectly arranged booklet page, ready to print.

Troubleshooting
- Make sure your content document actually has 8 (or more) pages. Use
#pagebreak()to add blank pages if needed.
Summary
I honestly expected more challenges in this project, but Typst is surprisingly clear and expressive at the same time. I already have other ideas where Typst could be useful for non-trivial typesetting, like choose-your-own-adventure games.